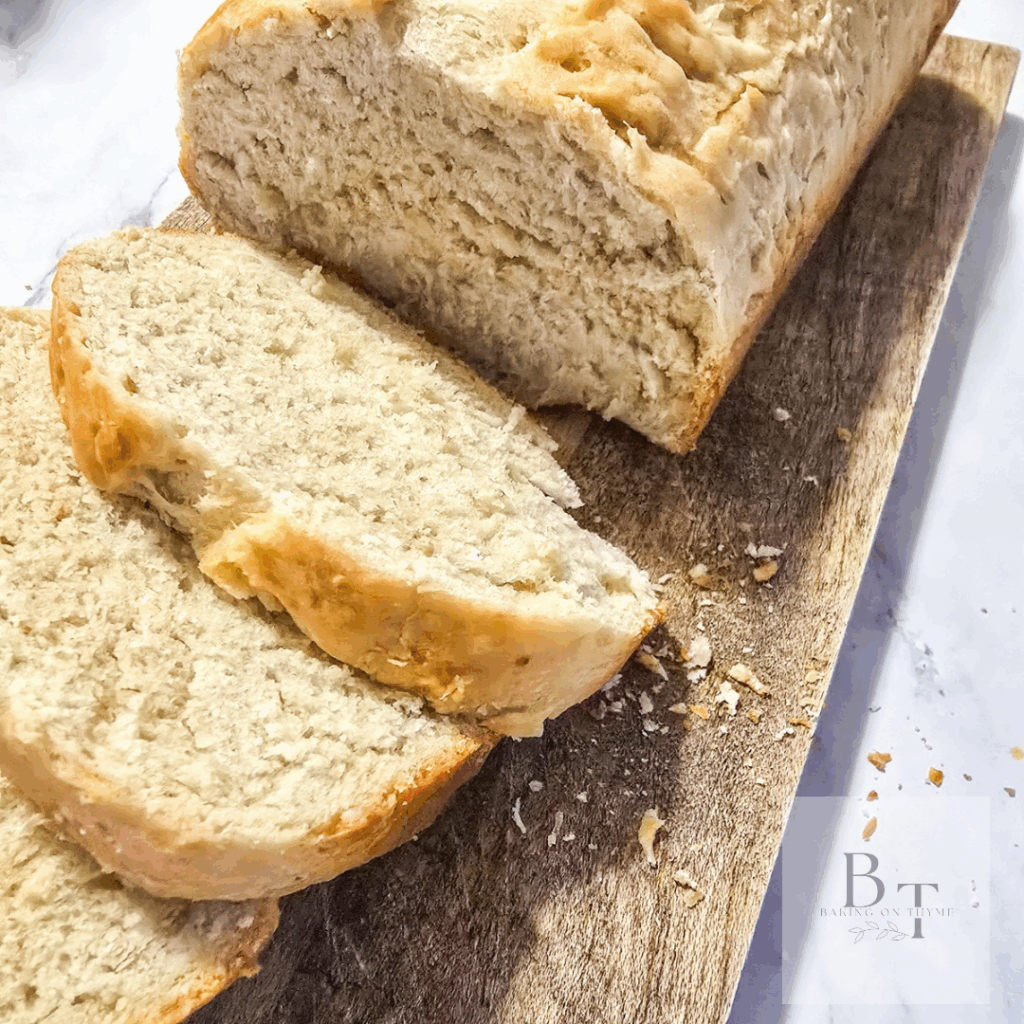
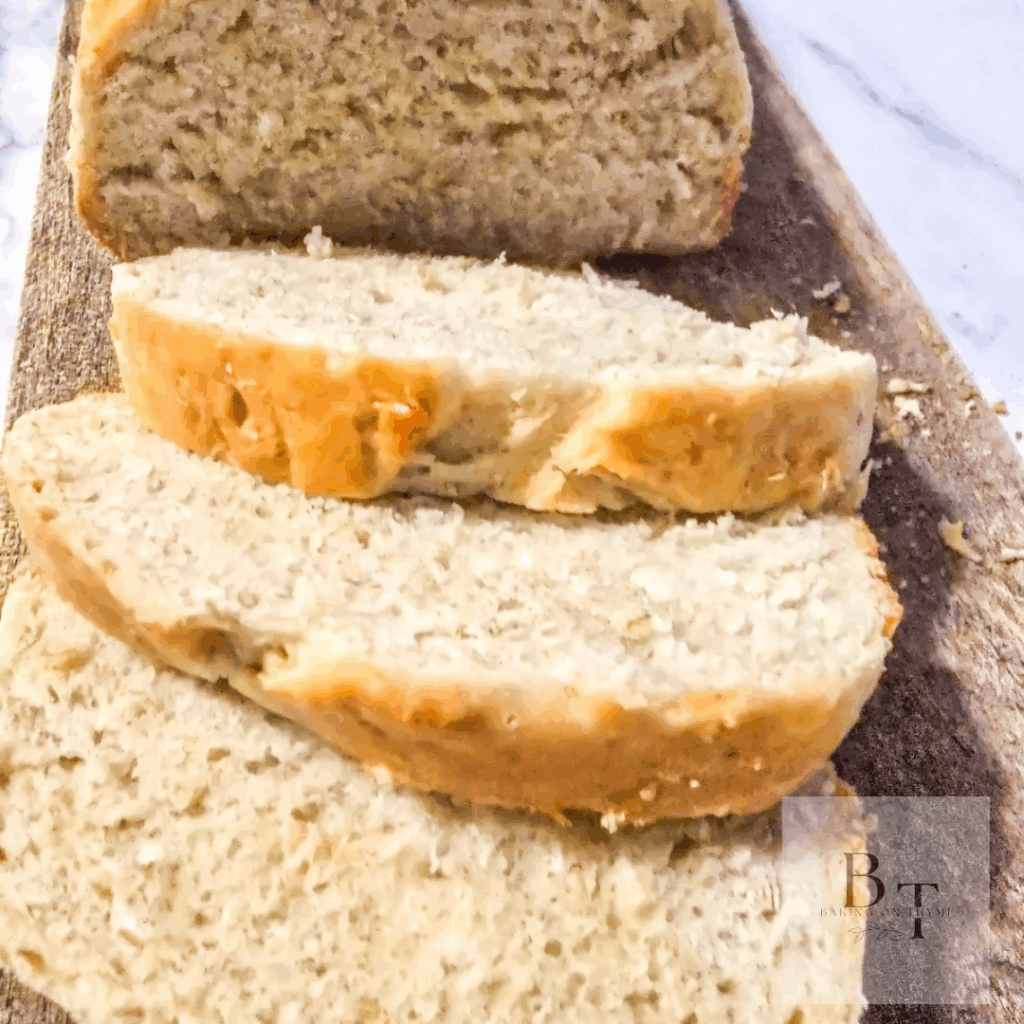
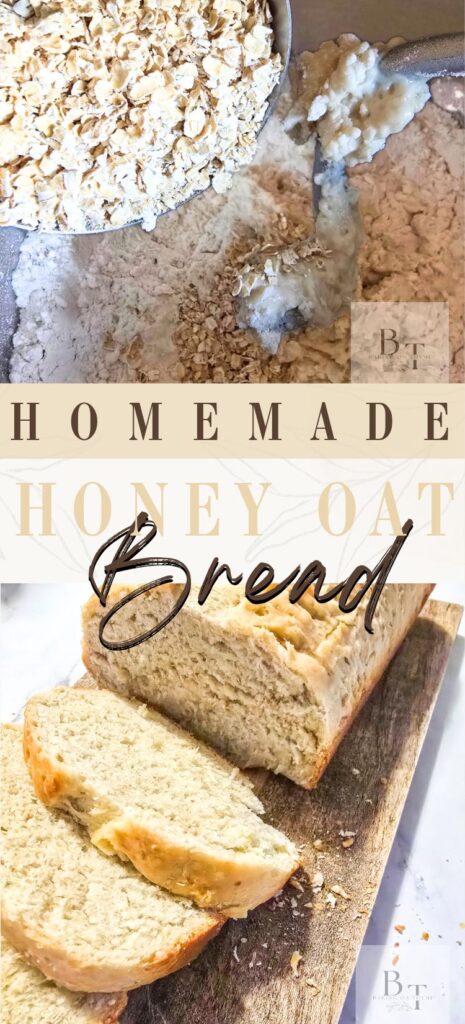
Homemade Honey Oat Bread
This Homemade Honey Oat Bread is soft, slightly sweet, and perfect for everyday sandwiches or toast. The best part? the stand mixer does most of the hard work for you.
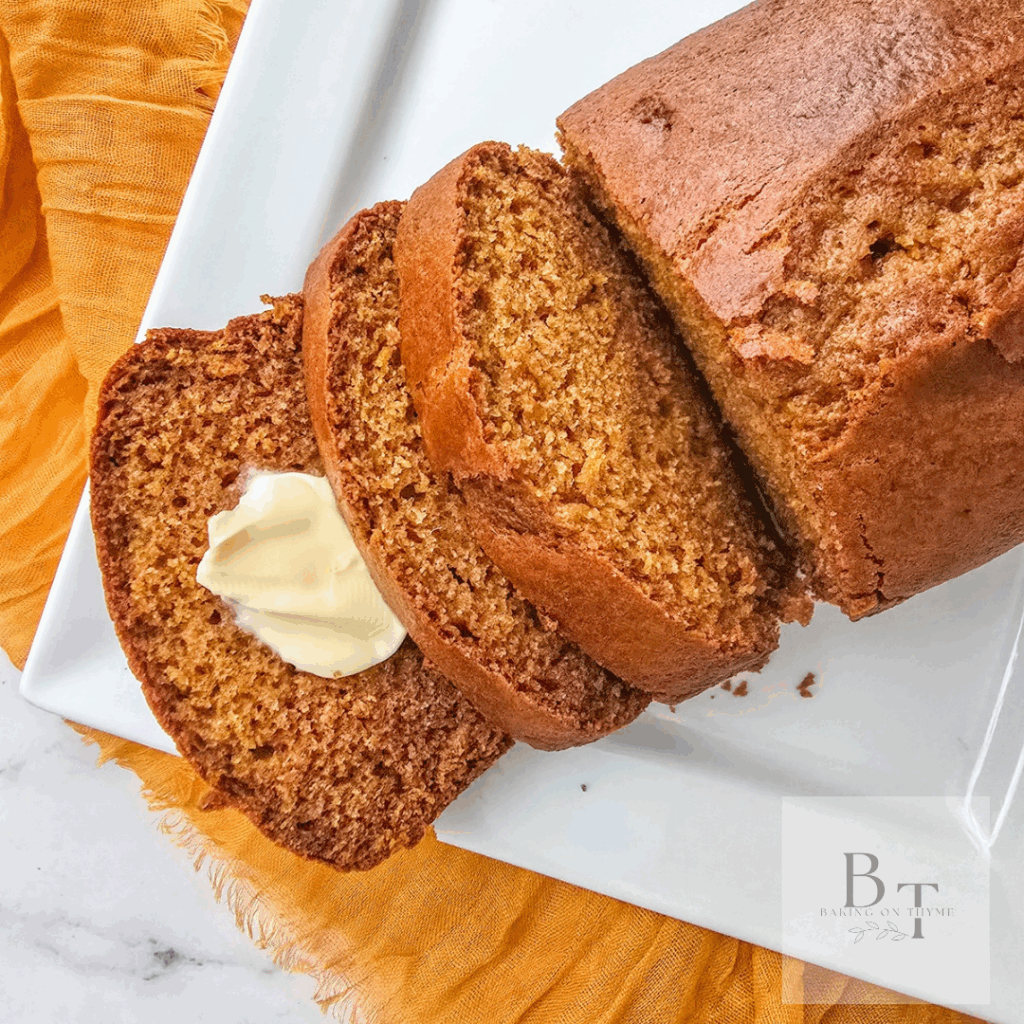
Homemade Honey Oat Bread:
This recipe is wholesome, simple, and perfect for anyone who loves a cozy homemade loaf without spending hours kneading by hand (of course, kneading by hand is always an option).
To begin, combine your warm water, honey, and yeast in the bowl of your stand mixer. After letting the yeast sit for a few minutes, you’ll notice it start to foam.
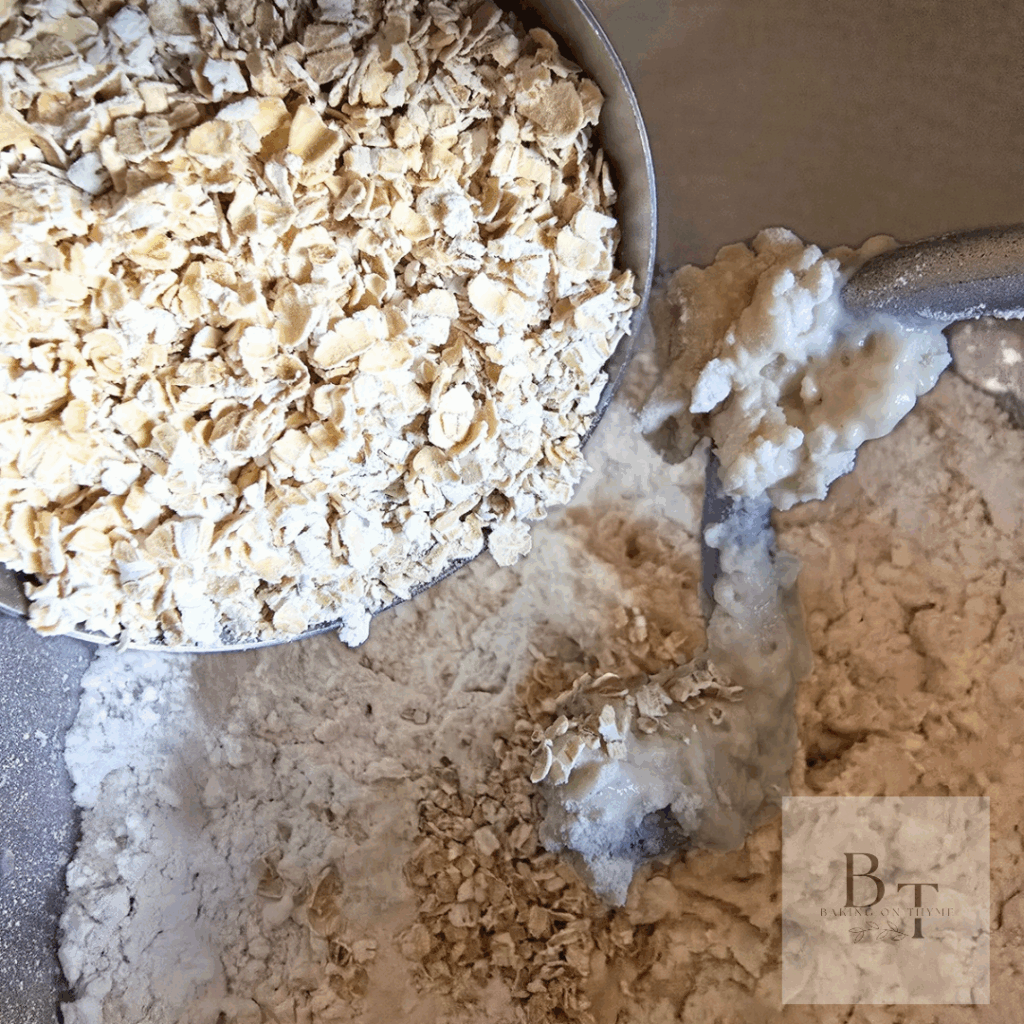
Next, add in the oil, salt, and oats, then using the dough hook gradually mix in the flour until a soft dough forms. As the dough comes together, increase the mixer to speed and let the dough hook knead it until it becomes smooth and elastic.
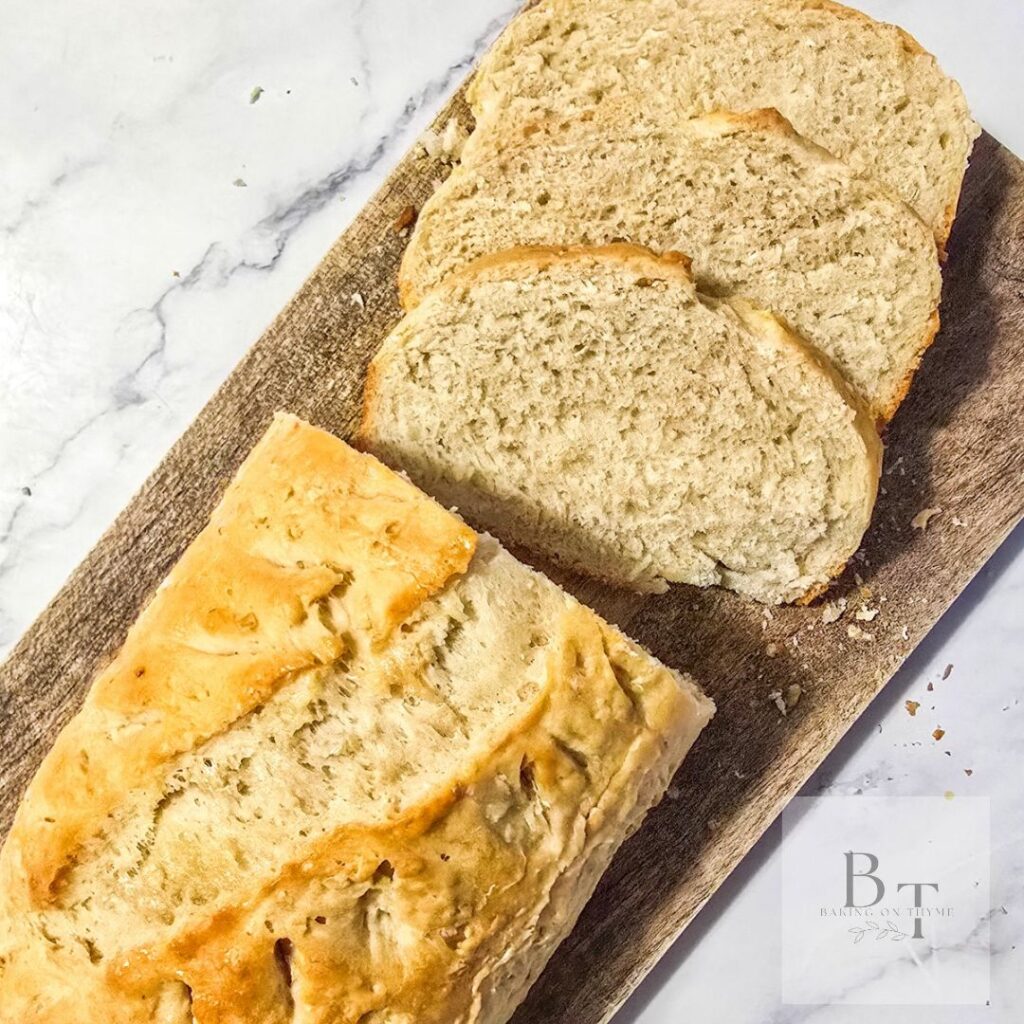
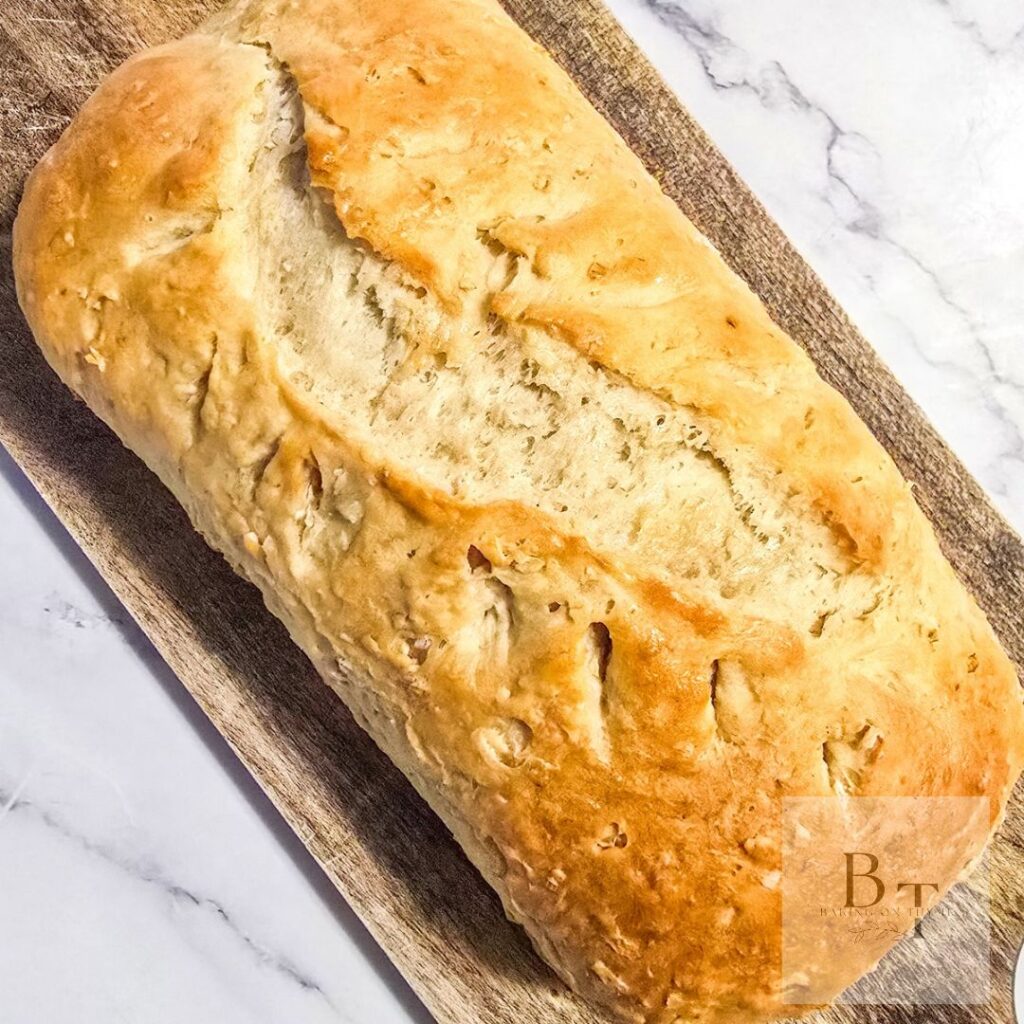
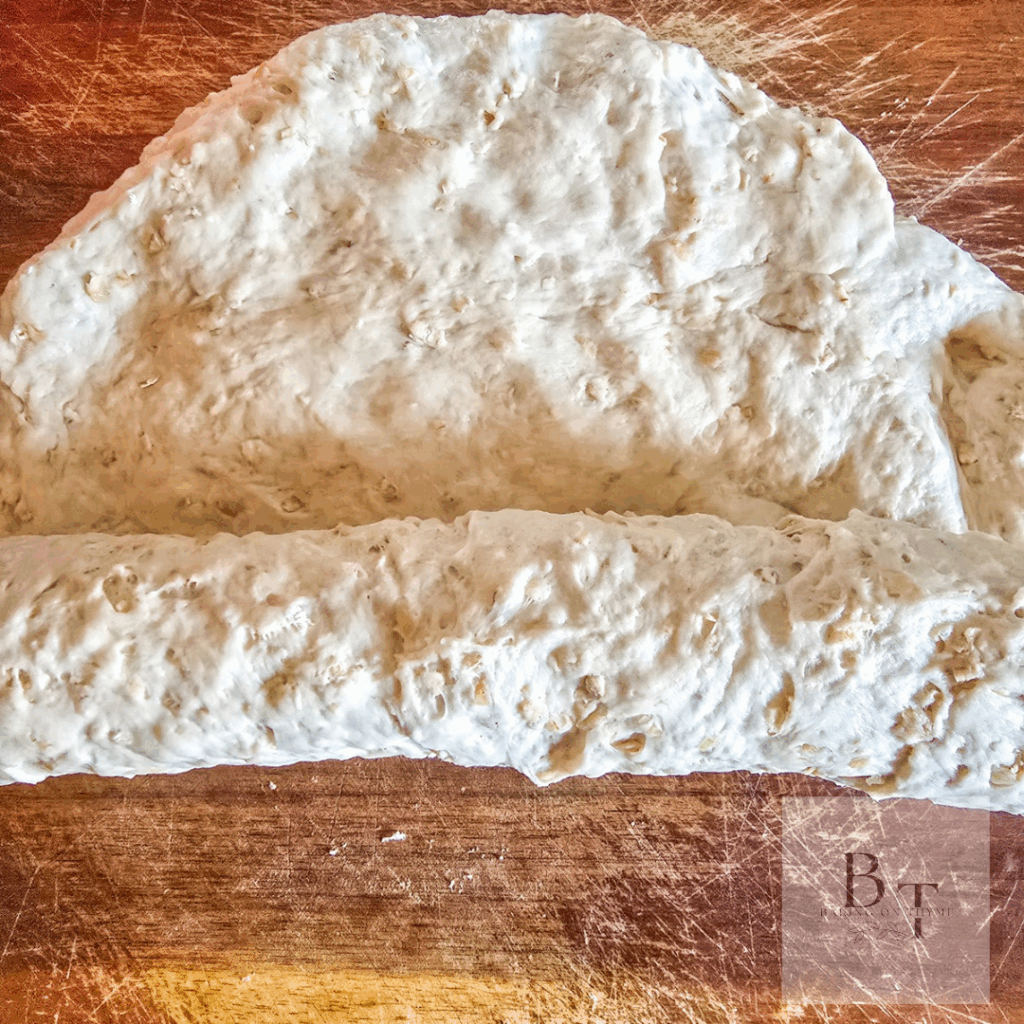
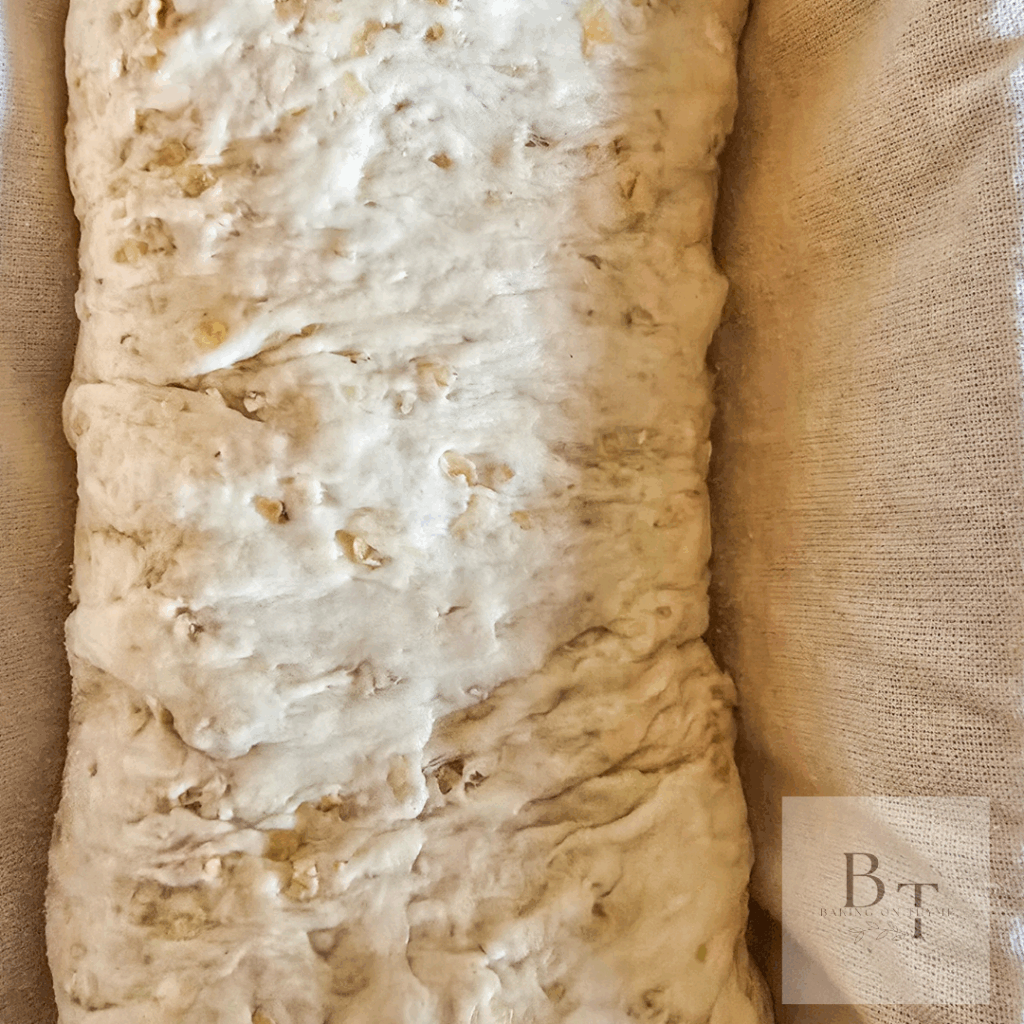
Once the dough has risen and doubled in size, it’s time to shape your loaf. Gently punch it down to release air bubbles, then roll it into a tight loaf and place it in a greased pan. After that, let it rise again until it’s nice and puffy.
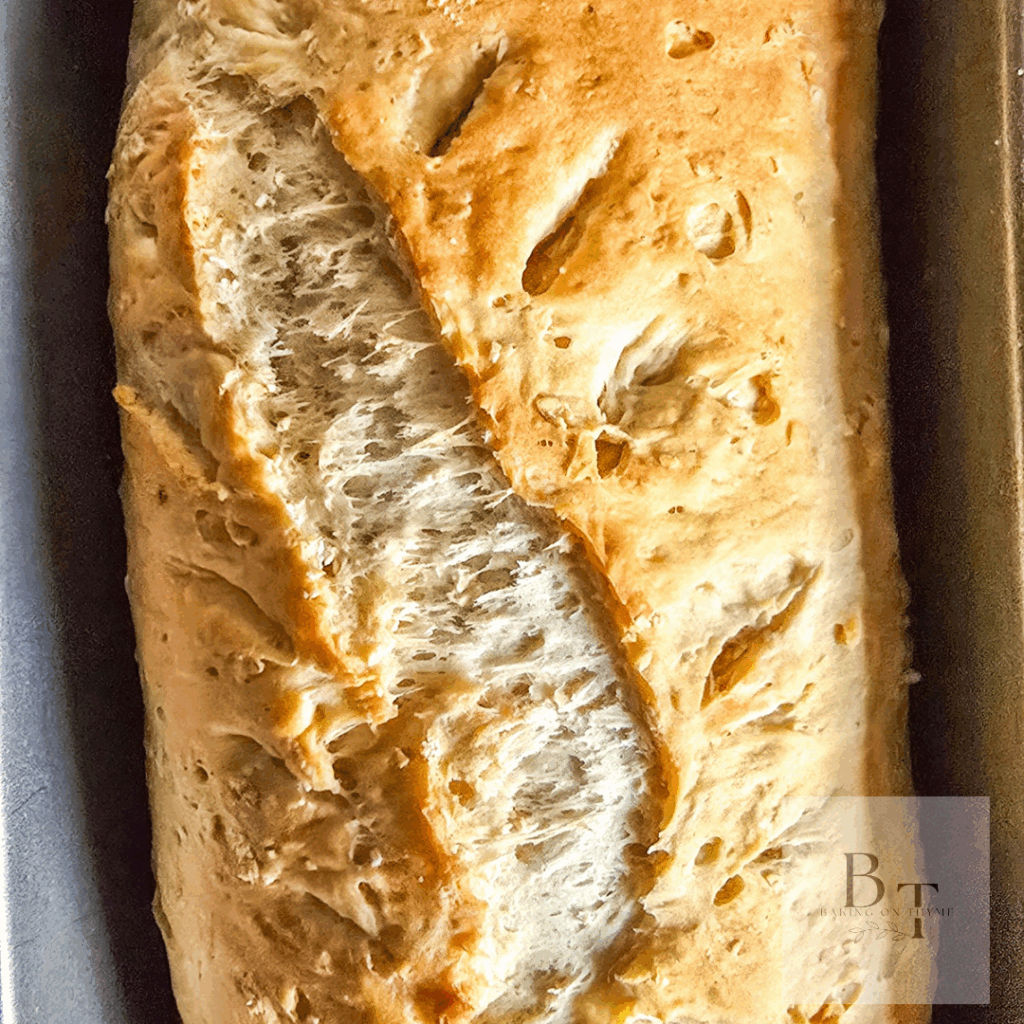
Finally, bake it in a preheated oven until golden brown and fragrant. As it cools, brush the top with a bit of butter.
Let’s bake!
Why You Will Love This Recipe!
- Dairy-free: Made with water, not milk — perfect if you’re out of milk or prefer a lighter loaf.
- Soft, moist texture: Rolled oats keep the crumb tender and the crust golden.
- Minimal effort: Your stand mixer kneads the dough to perfection while you clean up.
- Naturally sweetened: Just the right touch of honey for warmth and flavor.
Recipe At A Glance:
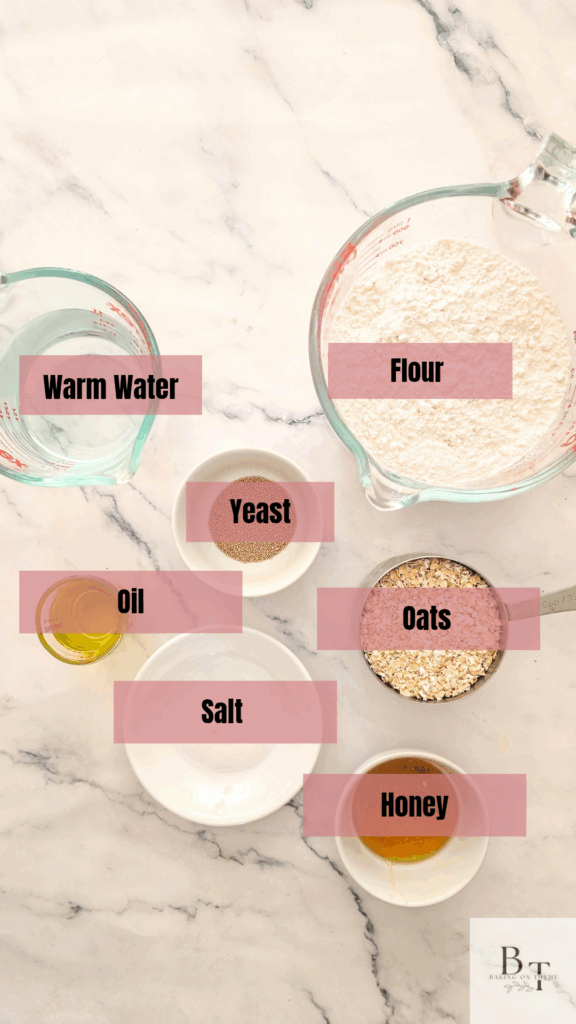
Water: You will need one cup of warm water.
Yeast: You will need two ¼ tsp (1 packet) active dry yeast
Flour: You will need three cups of all-purpose flour or bread flour
Honey: You will need two tbsp honey
Oil: You will need two tbsp neutral oil (like canola or olive oil)
Salt: You will need one tsp of salt for taste.
Rolled Oats: You will need one cup rolled oats (plus extra for topping)
Be sure to scroll to the bottom of the page to see the recipe card for the full recipe details.
Equipment Needed:
Whisk: For mixing the dry ingredients.
Measuring Spoons and Cup: For accurate measurements.
Stand Mixer with dough hook or Mixing Bowl: For the ingredients.
Loaf Pan: For the bread dough.
To get similar posts delivered to your email, join and subscribe. Share your thoughts below if you’ve tasted my delicious Homemade Honey Oat Bread.
Step By Step Instructions:
Step One: Activate the yeast
Gather all your ingredients, measure everything then set aside.
In your KitchenAid mixing bowl, combine warm water, honey, and yeast. Stir lightly and let sit for 5–10 minutes until foamy. This ensures your yeast is alive and ready.
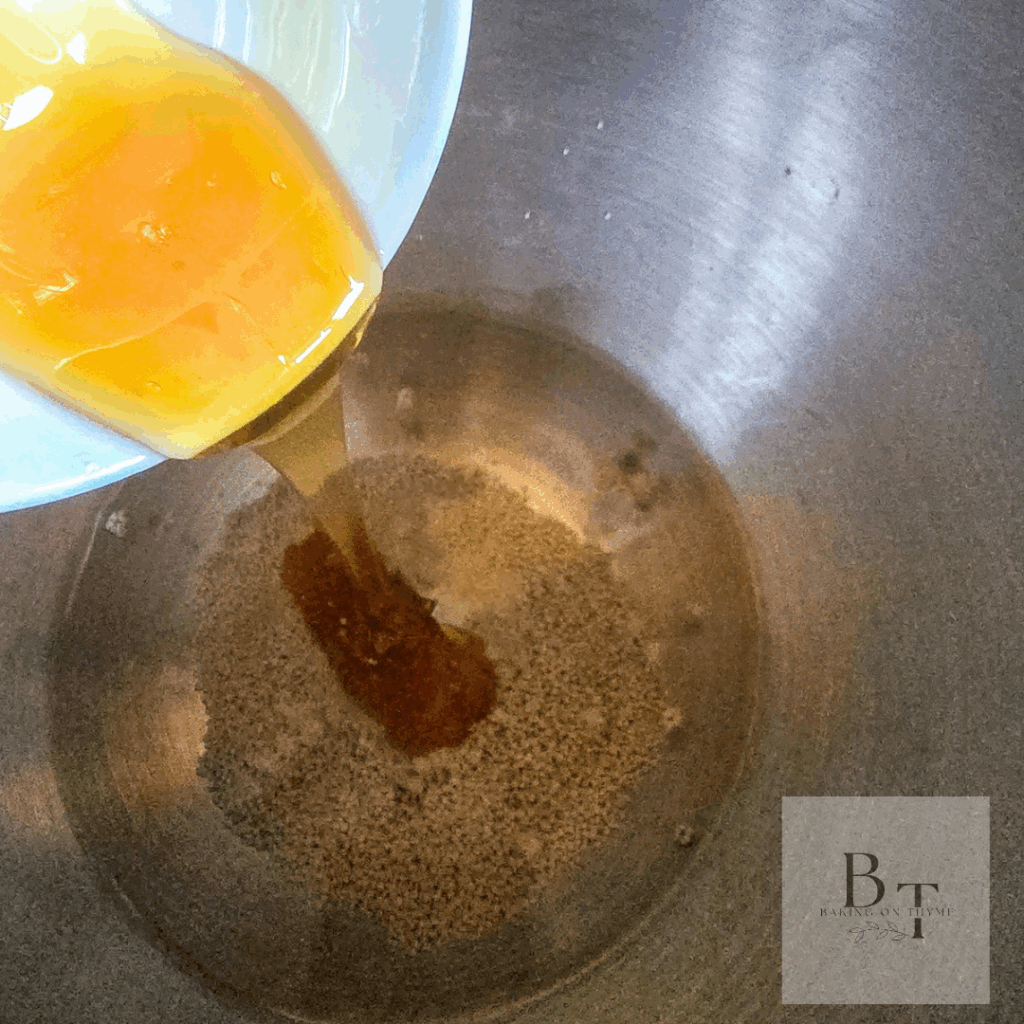
Tip: lightly coat the measuring cup with oil before adding honey – it’ll slide out much easier.
Step Two: Mix the dough
Add oil, salt, and oats to the bowl. Using the dough hook attachment, start mixing on low speed (speed 2). Gradually add 2 ½ cups of flour, one cup at a time, until a soft dough begins to form.
If the dough is still sticky, add a bit more flour, 1 tablespoon at a time.
Step Three: Knead with the mixer or by hand
Continue kneading with the dough hook on speed two for six – eight minutes, or until the dough is smooth and elastic. It should pull away from the sides of the bowl but still feel slightly tacky to the touch.

Step Four: First rise
Lightly oil the bowl, turning the dough once to coat. Cover with a towel or plastic wrap and let rise for one hour, or until doubled in size.
Step Five: Shape the loaf
Punch down the dough to release air bubbles. Shape it into a loaf and place it in a greased 9×5-inch pan. Brush the top lightly with water and sprinkle with rolled oats.
Step Six: Second rise
Cover and let the dough rise again for 30–45 minutes, until it’s about an inch above the pan rim.
Step Seven: Bake
Preheat your oven to 350°F (175°C). Bake for 30–35 minutes, or until golden brown and the loaf sounds hollow when tapped underneath.
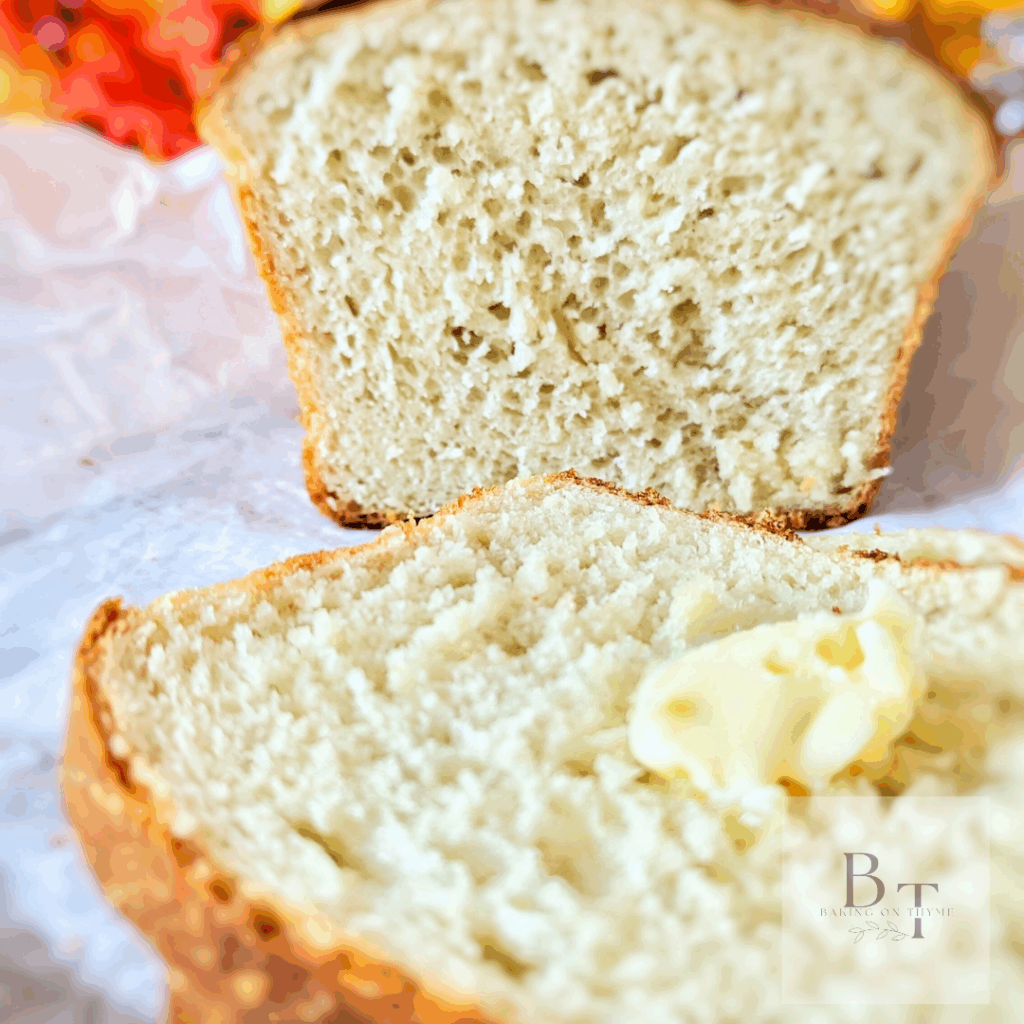
Step eight: Cool and finish
Cool in the pan for 10 minutes, then transfer to a wire rack. Brush the top with a bit of honey for shine and extra flavor (optional but beautiful).
Did you make my Homemade Honey Oat Bread? leave a star rating and review below. This helps other readers and helps with supporting my blog ! To stay up to date with the newest recipes, join my email list and be sure to follow me on Pinterest
Leftovers? No problem!
Store your delicious bread in an airtight container at room temperature for up to three days. To freeze, slice the loaf and store in a freezer bag — toast slices straight from frozen for a fresh-baked taste anytime.
Frequently Asked Questions?
Can I use instant yeast instead of active dry yeast?
Yes! You can substitute instant yeast for active dry yeast at a 1:1 ratio. The only difference is that you can skip the activation step — just mix it directly into the dry ingredients before adding the warm water and honey.
Can I make this bread without a stand mixer?
If you don’t have a KitchenAid, simply mix the dough with a wooden spoon until it comes together, then knead by hand for about 8–10 minutes. The rest of the process is exactly the same.
Can I use quick oats instead of rolled oats?
You can, but keep in mind that quick oats absorb liquid faster, so you may need to add an extra tablespoon or two of water. Rolled oats will give the bread more texture and a heartier feel.
Homemade Honey Oat Bread Tips and Variations
- Use bread flour if you want a chewier, higher-rise loaf.
- You can replace ½ cup of the flour with whole wheat flour for a heartier flavor.
- For a softer crust, cover the loaf with a towel while it cools.
- Slice it thick and serve with butter, nut butter, or your favorite jam — it’s amazing toasted!
Troubleshooting Common Mistakes
1. My dough didn’t rise – This usually happens if the yeast was old or the water was too hot or too cold. Make sure your water is warm (around 110°F / 43°C) — not boiling — and always check the expiration date on your yeast. If your kitchen is chilly, place the covered bowl inside your oven with the light on for a warm, draft-free spot to rise.
2. The dough is too sticky – It’s normal for this dough to feel slightly tacky, but if it sticks heavily to your hands, add a tablespoon of flour at a time until it comes together. Avoid adding too much, though — extra flour can make the loaf dense instead of soft.
3. The crust turned out too hard – This can happen if the bread is baked too long or cools uncovered. For a softer crust, brush the top with honey or butter while it’s still warm, then cover it with a clean towel as it cools.
More Delicious Recipes!
If you enjoyed my Homemade Honey Oat Bread have a look at my other bread recipes!
There’s nothing quite like the smell of freshly baked bread filling your kitchen. Making easy homemade bread at home might seem intimidating, but this recipe breaks it down into simple, easy-to-follow steps. With just a few pantry staples, you can bake a soft, fluffy loaf that’s perfect for sandwiches, toast, or enjoying warm with butter.
This homemade pumpkin bread is everything you want it to be—moist, full of warm spices, and just sweet enough to feel like a treat without being over the top. Whether you enjoy it in the morning with a cup of coffee or as an afternoon pick-me-up, this pumpkin bread is comfort baked into every slice!

This straightforward recipe for Roti with only three ingredients is simple to prepare and creates a deliciously soft bread. Roti is perfect to pair with any main dish or savour by itself.
Thank You!
This Homemade Honey Oat Bread is simple, wholesome, and perfect for everyday baking. Whether you’re a beginner or a seasoned home baker, your KitchenAid mixer takes the guesswork (and elbow grease) out of the process.
Serve it warm with butter and honey, or use it for sandwiches all week long — either way, it’ll taste like home.
If you bake this recipe, share your loaf on Facebook or Pinterest and tag @BakingOnThyme — I’d love to see how it turns out!
Thank you for reading my post today! Comment below if you have any questions or if you’ve tried my Homemade Honey Oat Bread.
Hopefully, baking brings you joy and happiness as it does for me and my family!
From my kitchen to yours,
Jas xoxo